How to build a small business website in minutes: a step-by-step guide
A customer stumbles upon your business and wants to learn more. They grab their device, search your name, and... can find nothing. No website, no details, only scattered mentions on social media.
At this point, most people won’t dig any further. They’ll move on.
Lack of a website makes a business look outdated – or worse, unreliable. People expect to find you online even if you run a small shop or local service. A website tells them who you are, what you do, and how to reach you. It builds trust before they even step through the door.
Some business owners worry that websites are expensive or complicated. That may have been valid years ago, but not anymore. Today, you can set one up in minutes, with no coding or big budget needed. Here’s how to do it:
Why your small business needs a website
People look online before they buy, visit, or book anything. If your business isn’t there, you’re missing out on customers already researching what you do.
A website makes your business real in the eyes of potential customers. It’s where they check your hours, see what you sell, and decide if they will use your services. If you don’t have a website, they might assume you’re not open or pick a competitor that shows up first.
It’s not just about being visible, though. A website gives you control over how people see your business. Social media sites are helpful, but you don’t own those platforms. A website is yours. It works 24/7, brings in new customers, and helps grow your business – without relying on foot traffic or word of mouth.
If you’ve been putting it off because it seems too complicated, don’t. You can build one today, no experience needed.
A simple checklist to create your small business website
Follow our step-by-step verification, and you’ll have a professional website ready to welcome customers in no time.
Step 1: Choose a website builder
Nowadays, you don’t need to be a web developer to create a website. All you need is a drag-and-drop editor – a simple app that allows you to build and move website elements as you please.
Here are a few great options to consider:
- Wix: Perfect for beginners. Its drag-and-drop editor is very easy to use, and you can re-use hundreds of templates. Plus, it’s affordable, starting at just $11.60/month
- Squarespace: If you want a sleek, professional look for your website, Squarespace is your go-to. It’s great for small businesses wanting to stand out. Plans start at $20.63/month
- Shopify: Ideal for online stores! It’s packed with e-commerce tools like inventory management and payment processing. Starts at $32.33/month
- WordPress: Highly customizable and great for long-term growth. You can use one of thousands of templates and power it up with extra plugins. It’s completely free to use
Need more ideas? Check out our handpicked list of top website builders for small businesses.
Step 2: Get your domain name and hosting
Your domain name is your website’s address – it’s how people find you online. Think of it like your business’s street sign. Here’s how to pick one that works:
- Keep it short → Aim for something easy to type and remember. For example, JoesBakery.com is better than JoesAmazingBakeryAndDessertsOnline.com
- Decide on a domain extension → In 2025, many .com domains are already taken, so if yours isn’t available, consider opting for a different extension.
- Make it relevant → Include your business name or what you do. If you sell handmade candles, HandmadeCandles.com tells visitors exactly what to expect. This is especially important if you’ve only just started working on your brand awareness. Pepsi doesn’t have to tell people that it’s a fizzy drink – but that’s how brand recognition works.
- Stay professional → Avoid numbers, hyphens, or unnatural spellings. R0bsBurgers123.com or Robz-Burgers.com can confuse people.
You’ll also need hosting – some space to store your website’s files. Many website builders, like Wix and Squarespace, include hosting for free in their plans. That means you can skip the extra step of finding a separate hosting provider.
Step 3: Plan your website content
Before you start dragging and dropping, take a moment to map out your website’s content. That way, you’ll avoid blank-page panic and ensure your visitors find what they need.
Here are the must-have web pages for a small business website:
- Homepage – This is your storefront. Keep it simple: a clear headline, a short description of what you do, and a call-to-action (like 'Book a Call' or 'Shop Now')
- About Page – Customers want to know the story behind your business. Share why you started, what you stand for, and what makes you different
- Services or Products Page – List what you offer, including pricing (if applicable). If you sell online, this is where you should place e.g., a product catalog or booking options
- Contact Page – Make it easy for people to reach you. Include a contact form, email, phone number, and even a Google Maps widget if you have a physical location
You can prepare your content first and then match it to the template, or start by which design to use and planning your content around it.
Want to add more pages? A section with testimonials, FAQs, or a simple blog can help you build trust and improve online visibility – but keep it lean initially.
Step 4: Use drag-and-drop tools to build your site
Now it’s time to bring your website to life – without any code.
Most website builders use editors with a drag-and-drop interface, so you can move things around like puzzle pieces. Text, images, buttons – it’s all customizable with just a few clicks. Want to change colors or swap fonts? Easy. Need to add a new section? Done in seconds.
If design isn’t your thing, don’t worry – website builders offer professionally designed templates to make your site look polished. Simply pick one that fits your business (e.g., a restaurant theme or an online store layout), update the text and images, publish it when you’re ready, and you’re set!
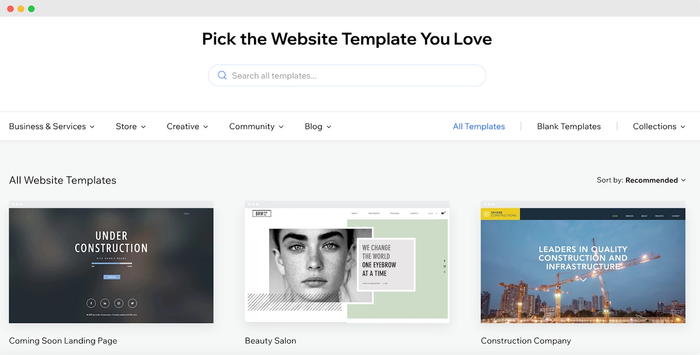
For instance, Wix offers hundreds of templates.
Customize your site and move on to the next step!
Step 5: Add essential features
A website should make it easy for visitors to contact you. A few key features will help you capture leads and create a smooth customer experience.
Lead capture features
- a contact form – a simple way for customers to send questions or briefs. Most website builders include built-in forms – but you can also use third-party tools like Transpond signup forms.
- a signup form – use your signup form as a lead magnet – offer something valuable like a free consultation or discount to attract leads. CapsuleCRM can then help manage and track these leads with easy-to-use sales pipelines. See for yourself.


- a booking system – If your business relies on appointments, use an integrated scheduling tool (like Calendly or Acuity Scheduling) and embed it on your site.
Social media features
- Place icons for Instagram, Facebook, LinkedIn, or other relevant platforms in the header or footer.
- Consider embedding a live feed if your social media pages receive frequent updates or many comments.
SEO features
- Install an SEO plugin – If you use WordPress, install Yoast SEO or Rank Math to guide you through setting up relevant keywords, title tags, and meta descriptions.
- Perform keyword research – Use free SEO tools like AnswerThePublic and AlsoAsked to discover relevant questions in your niche. You can also try Google Keyword Planner for free to verify the search volume of your selected keywords.
- Choose clear, keyword-friendly titles – Instead of 'Welcome,' use something descriptive like 'Handcrafted Soy Candles – Free Shipping in the US.'
- Check mobile optimization – Google favors mobile-friendly sites, so ensure everything looks right on mobile devices.
With these features, your website will be functional, welcoming, and easier to find online. Start small with the ones that fit your business, and add more as you explore what works best.
Step 6: Preview, test, and publish
Before launching your business website, take a few minutes to check that everything looks and works as expected. Minor adjustments now can improve the visitor experience and prevent major issues later.
Check how your site looks on different devices
Your audience will access your site from phones, desktops, and tablets. Make sure to test on multiple devices:
- Text → Is it readable without zooming?
- Images → Do they resize properly?
- Buttons & links → Are they easy to tap?
Many website builders have a built-in preview mode that allows you to see how your site will appear on various screen sizes.
Test links, forms, and navigation
Click through every page to confirm that all links, buttons, and forms work. A few things to check:
- Internal and external links open correctly
- Contact forms send messages to the right inbox
- Navigation menus work on mobile and desktop
If you offer online booking or payments, test them to ensure everything runs smoothly. You don’t want visitors to land on your site and leave frustrated just because you skipped a quick 10-minute test. A little effort now saves a lot of lost opportunities later!
Make final adjustments and publish
Once everything looks correct, hit publish. Congratulations, you got your business website up and running.
Just because your website is live doesn’t mean the work is done. Keep it fresh by planning updates, adding new content, and improving features you didn’t have time for in the first round.
A website is never truly finished – it evolves with your business. The most crucial step is getting it online so customers can find you.
Tips to keep your website fresh and engaging
A website for your business isn’t something you set up once and forget. It’s like a brick-and-mortar storefront – if it looks abandoned, people will walk right past it. Or worse, never see it! Keeping your website fresh doesn’t take much, but a few slight updates can make a big difference.
Update your content regularly
Think about the last time you looked up a business online. You’d probably leave fast if their homepage still promoted a sale from two years ago or listed an outdated address.
Make small updates now and then:
- Swap out old promotions for new ones.
- Add fresh testimonials from happy customers.
- Refresh your homepage text to match the season.
If you have a blog, try posting once a month. It doesn’t have to be long—just something useful for your audience, such as:
- A quick guide
- An answer to a common question
- An update about your business
- A customer success story or testimonial
- A behind-the-scenes look at your process
- A list of helpful resources or tools
- A breakdown of industry trends or insights
- A comparison of different solutions to a common problem
- A FAQ roundup based on customer inquiries
Monitor your website traffic
It’s easy to guess what people want, but it’s the actual data that tells the truth. Google Analytics 4 can show you where visitors come from, what they click on, and where they lose interest. If a page isn’t getting much traffic, maybe it needs a stronger headline or a more straightforward call to action.
How to connect Google Analytics 4 to your website?
- Create a Google Analytics account – Go to Google Analytics and sign in or create an account.
- Set up a property – Click 'Admin,' then 'Create Property.' Choose GA4 and enter your website details.
- Get your tracking ID – In the GA4 setup, generate a measurement ID (looks like G-XXXXXXXXXX).
- Add the tracking code to your website – If using WordPress, install a GA4 plugin. For other sites, paste the tracking code into your website’s <head> section.
- Verify the connection – In GA4, go to 'Reports' and check if data is coming in. It may take a few hours to appear.
Now, you can track visitor behavior and improve your website based on real insights! Check in on your numbers every so often. If you spot a trend, tweak your site accordingly.
Small updates go a long way – when customers see new content, they know your business is active and worth their time.
Your website is closer than you think
Building a website doesn’t have to be complicated, expensive, or time-consuming. With the right tools, you can design a professional site in minutes, not months.
You only need to:
- Pick a website builder that fits your needs.
- Get a custom domain name and hosting.
- Add the most essential pages.
- Use drag-and-drop tools to personalize your site.
- Consider adding new features.
- Check everything, then hit publish.
- Plan for regular updates.
The sooner you start, the sooner customers can find you. Ready to take the next step? Check out the best website builders for small businesses and get your brand in front of more people.