Adding a Person’s Organization
When you start typing in the Organization field it will start populating with existing Organizations matching what you’re typing. If you’d like to add the person to an existing Organization then simply select one from the list of suggestions. Alternatively, you can add it to a brand new Organization by typing out its unique name. Once saved, a new Organization record will be created for it.
Changing a Person’s Organization
There is a very specific process for changing a Person from one Organization to another.
When the Person moves Organizations without their history
When viewing the Contact, click to Edit the Contact. Then, update the name in the Organization field. This will link the Contact with the new Organization. Their history will be retained on their previous Organization.
When the Person moves Organization with all their history
If you would like to change the Organization linked to a Person and also have their history transferred over onto the new Organization:
1. Add ‘?advanced’ to the end of the contact URL like this: https://example.capsulecrm.com/party/12345678?advanced
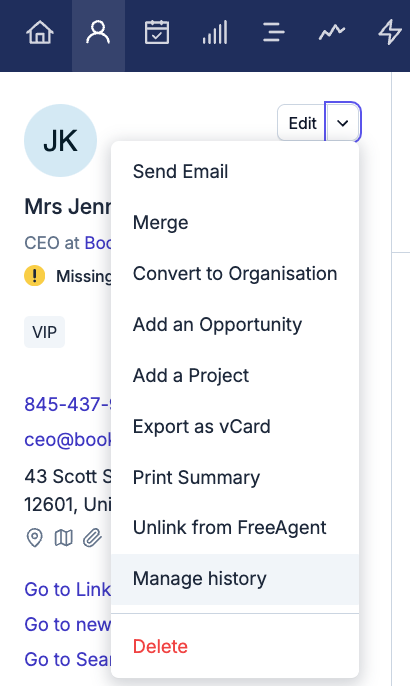
2. Go to the Actions menu and click on the option to Manage History

3. Confirm that you want to ‘Link previous history to current Organization’. Click the button to link and you’re all set.
Any history that was made will now be stored on the new Organization.
Converting from Person to Organization and vice versa
Contacts imported into Capsule or auto-created by the Mail Dropbox may result in the wrong Contact type - Person instead of Organization, or Organization instead of Person.
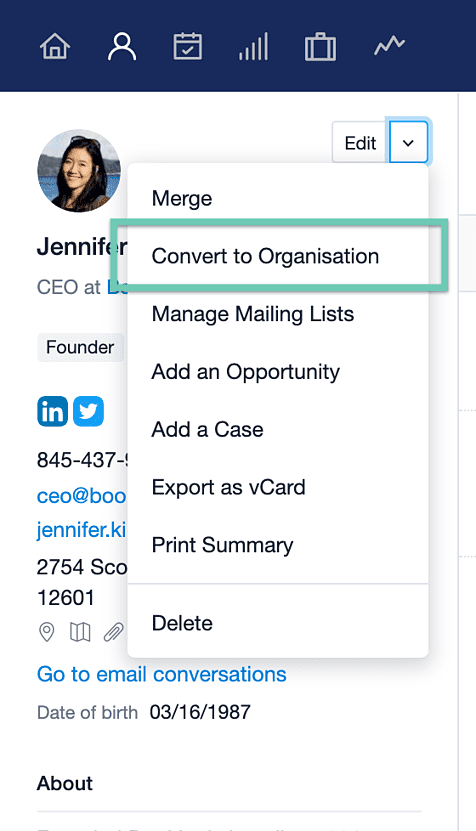
This can be easily changed from within the Contact. By using the down arrow button next to the Contact name, choose the option to Convert to Organization, or Person.

Merging Contacts
Sometimes a duplicate record for the same Contact is accidentally created. All the information stored on both records creates a history that has to be converted into a merged Contact record.
1. Select one of the Contact records
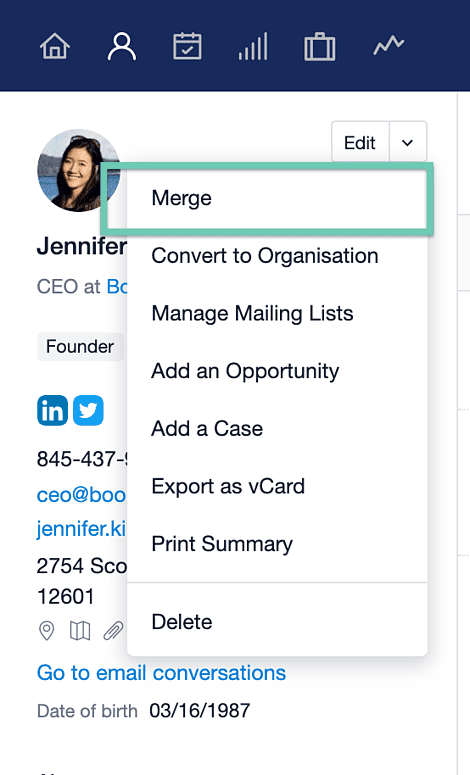
2. Select the drop-down arrow next to the Edit button
3. Choose the Merge option

4. Capsule attempts to find and display the correct record(s) to merge. Select from this list or type the correct name into the search field. Click on the name and Capsule will return the newly merged record.
5. Check the details, and if you’re happy, click Save. The duplicate Contact is deleted.
Updating Contacts through an import
Sometimes you may want to make updates to multiple Contacts at once such as changing the value in a Custom Field. This can be done through an import. The file you import needs to have certain fields which match existing Contacts in Capsule in order for the update to work. The easiest way to do this is to export a list of Contacts, adjust the values you want to change and then re-import the same file. This ensures that the correct Contacts are being updated.
Step 1: Exporting your Contacts from Capsule
First, you'll start by gathering a list of your Contacts:
- Start by navigating to the People & Organizations tab and filter your list of Contacts to get the list you'd like to update.
- Then select Export at the right-hand of the page.
- In the popup, make sure All columns is selected. Choose either the CSV or Excel option, and click Export.
Step 2: Organizing your CSV file
Once you have your list of Contacts, you can edit your CSV or Excel file. Open up the downloaded file in a spreadsheet and you will be best to delete most of the columns.
By default, the duplicate checker uses a combination of name and email address to update people records in Capsule, whereas only the organization name is needed for updating organizations. If you use this method, you should only keep these columns:
- Contact ID
- First Name & Last Name columns (only if it’s a person you’re updating)
- Email (only if it’s a person you’re updating)
- Organization Name (only if it’s an Organization you’re updating)
- The column for the field you want to update
Step 3: Importing back into Capsule
Once you've made your changes to the file, go back into Capsule and import:
1. Select Import Contacts on the People & Organizations tab
2. Click From a File then select People and Organisations option
3. You will now need to map each column from the file to the relevant fields in Capsule. Make sure the ID column is mapped to Contact ID
4. In the next step you get to preview a sample of the import. Once you're happy, click Next
5. Choose the option to Import and update duplicates using the data from your file. If applicable, also check the checkbox which says Overwrite name, job title, Organization and Custom Fields.

6. Finally click Import Now. Your import will start and you will be notified via email when it's complete.
Fields that can't be updated by Import
- Certain fields like tags, addresses, phone numbers or email addresses can have multiple entries per contact. For these fields Capsule will always add a new entry rather than overwrite the existing ones. It cannot ever replace or partially complement those fields.
- For users on plans with access control features, there is a field for Owner. This field can't be updated with an import. It always needs to be updated inside Capsule.
- Notes & email history can't be added onto existing contacts. It can only ever be added when creating new contacts with the import.
Deleting files stored against a Contact
Files attached to your Capsule Contacts, Projects or Opportunities take up storage in your account. If you’re nearing your storage limit and want to remove some unnecessary files you can follow these steps to create space:
- When viewing a Contact click on the Files tab
- Locate the file you want to delete and click to open the note or email the file is attached to.
- Under the body of the note or email you will see the name of the file, then click X next to the file name to remove it from the note. Finalize your changes by selecting Save.
A list of files with attached notes and option to remove