If you have a form setup in Squarespace and you'd like to create new contacts in Capsule for each submission, you can connect your Squarespace form to Capsule via Zapier. This article will explain the steps you need to take and some tips on how to stay on top of these leads.
Prerequisites
- Your Zapier plan needs to allow for multi-step Zaps
- Your Squarespace form needs to ask for at least a name and email address. Preferably first and last name split out into separate fields.
- If you're populating any custom fields, those need to be created in your Capsule account first.
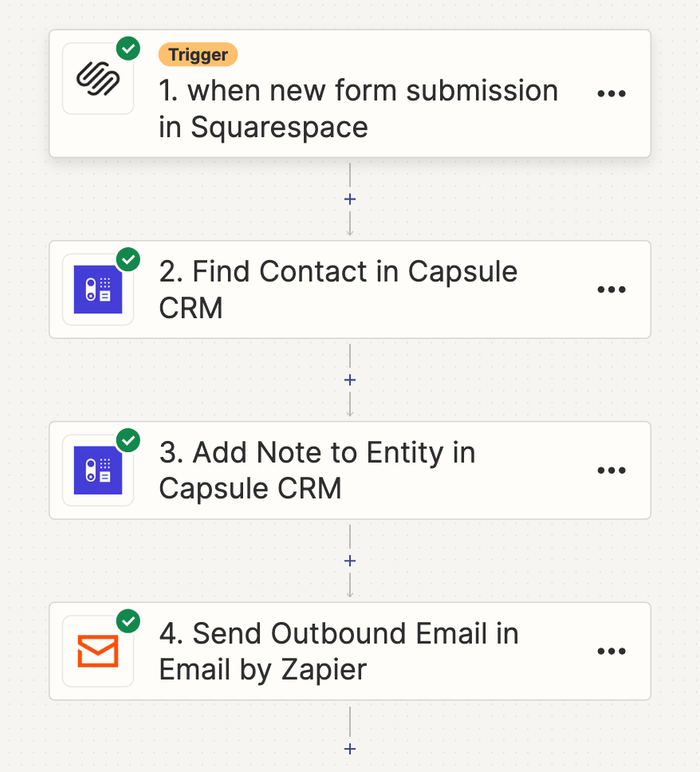
How to setup the Squarespace to Capsule Zap
1. Login to Zapier and create a new Zap.
2. For the trigger step, search for Squarespace and select 'When a new form submission in Squarespace' as the trigger. Choose the form you want to use and continue.
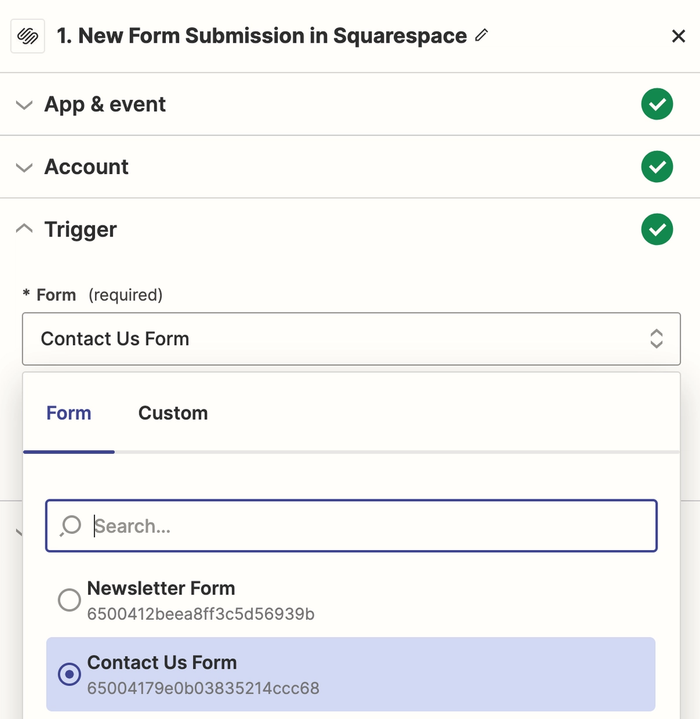
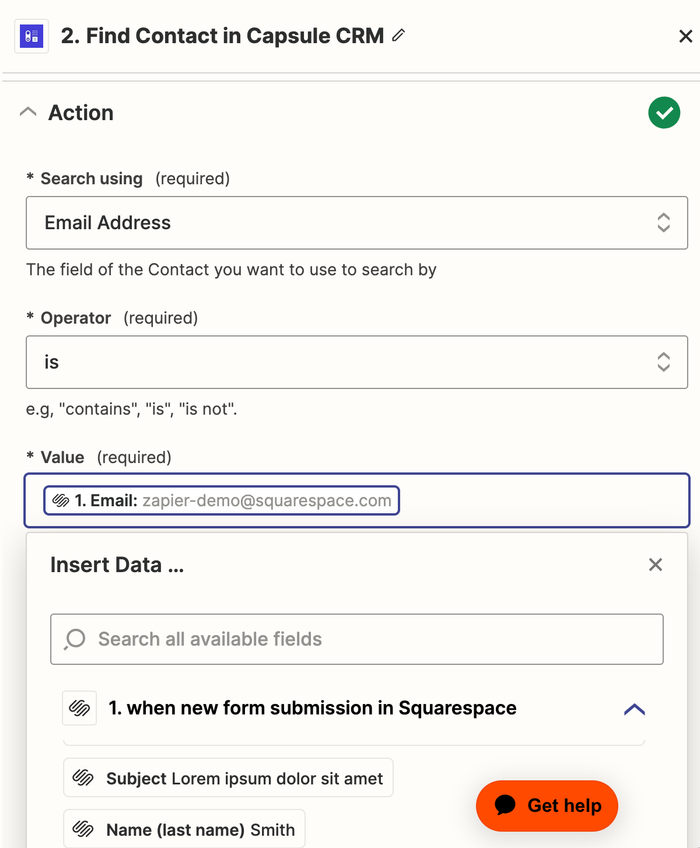
3. Next you want to look up the contact in Capsule. We recommend this step to ensure that you don't create any duplicate contacts. Search for 'Capsule' and select the Find Contact in Capsule CRM step. Setup this step with 'Search using' as Email Address, Operator as Is and in the 'Value', select the Email Address from your Squarespace form trigger.
4. At the bottom of the 'Search' step, check the box for “create Capsule CRM contact if it doesn’t already exist yet?”. This way, if the form submission is for a brand new contact, the Zap will create a contact for it in Capsule.

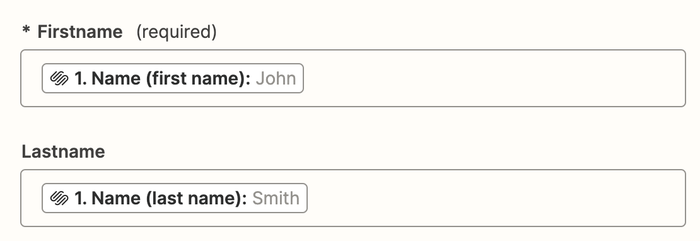
5. Now setup the New Capsule CRM Contact action. In the Email, First Name and Last Name fields, select the corresponding fields from your Squarespace form and continue populating any other Capsule fields with other fields from your form. If you're populating custom fields then make sure you have first created those custom fields fields in your Capsule account.

6. Next you'll want to log an Activity entry in Capsule, against the newly created contact. This is especially helpful if you have a 'message' field in Squarespace which wouldn't fit in a normal custom field in Capsule. Add another step to the Zap for Add Note to Entity in Capsule CRM.
7. At this point you'll be asked to link the Note to a contact. In the 'Contact' field, switch to the Custom tab and select from the 'Find Contact in Capsule CRM' step and select the ID field.
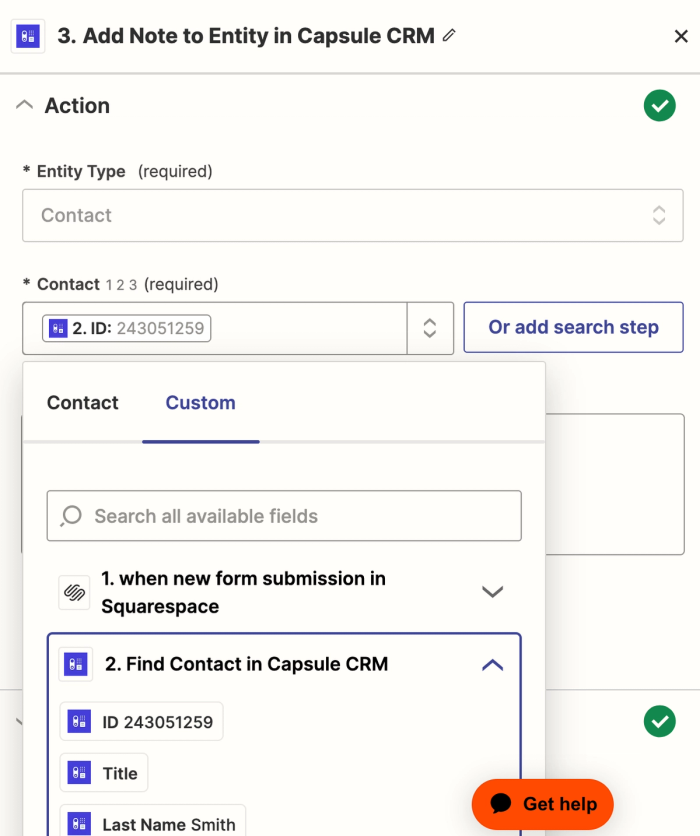
8. Then enter any other details you'd like in the note field, including values from the form such as any message or other details.

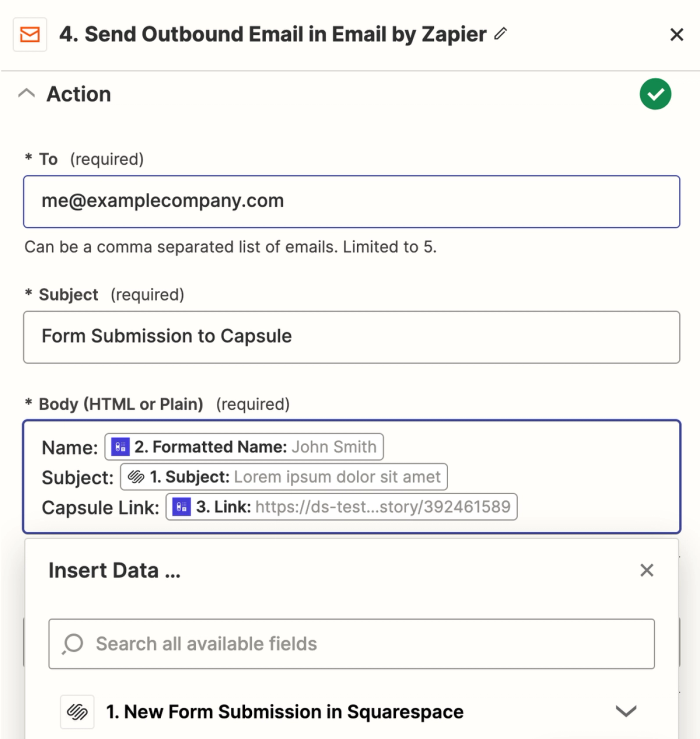
9. Finally, if you'd like to be notified when there is a new submission, you can setup a last step for Send outbound email by Zapier, to send yourself an email letting you know that there's a new submission. This is optional but can be helpful if you want to make sure you respond to each submission as quick as possible. In the email you can include a link to the newly created Capsule contact for example.
There are of course endless of options to further customize your Zap. Some people like to tag their contacts in Capsule with something relating to the forms. Others like to setup a task in Capsule for the newly created contact to be reviewed. You can of course create a new sales opportunities in Capsule off the back of the submission as well.
If you have any questions about setting up this Zap or need help, please reach out to our support team and we'll be happy to help.
How to create an Opportunity through the Squarespace Zap
As mentioned above, you can add on more steps to the Zap for any additional actions you'd like to take. One common step is to create a new Sales Opportunity in Capsule for each new form submission. We would only recommend that you use this option if you get a relative small number of submissions, as otherwise your Capsule account can quickly fill up with more Opportunities than you can manage.
This option is especially usedul if you're using a private form that you only share with customers that you have already qualified as "worthy" of a Sales Opportunity.
Once you've created the Zap as per above, at least to Step 5 - creating a new contact in Capsule, follow these steps:
- Add a new step to your Zap - look for Capsule and then choose the option to Create Opportunity in Capsule CRM.
- Just like in the Add Note to Entity step in the previous section, you now have to link the Opportunity to the contact in Capsule. Click into the Contact field and from there, go to the Custom tab, use the 'Find Contact in Capsule CRM' step and select the ID field.
- Continue populating the other required fields on the new Opportunity. First select a Pipeline, which will then ask you to select a Milestone. Then make sure to give the Opportunity a name as well. The other fields are optional but it's especially helpful to set an Expected Value and Close Date.
- Press Continue to finish off the Zap and you're all set. Now each time you get a form submission, a new Opportunity will be created alongside the new Contact.