Capsule is powerful tool for managing your Sales Pipeline, and makes it so easy to keep track of and manage your sales opportunities and Projects. With Workflow Automations we're adding more power to the Sales Pipeline and your Projects. Automations can help you add tracks, change assigned users & teams, or even create Project linked to your Opportunities. Using Automations you can save time for yourself and your team, streamline your Sales Process, Project Management, and help your Capsule users focus on what's important.
Workflow Automations are available to users on the Growth, Advanced and Ultimate plans.
What are Workflow Automations?
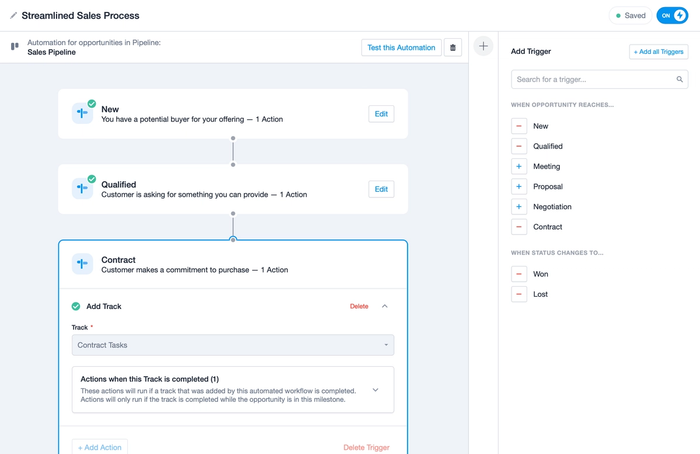
A Workflow Automation lets you setup different actions to happen for your Sales Opportunities or Projects based on when they're moved to a Milestone/Stage or if they're set to Won, Lost or Closed. For example, if you have Milestone for when a contract is drawn up for a potential customer and a dedicated team member handles everything related to it, then your Workflow Automation can reassign the Opportunity to that user and apply a Track to the Opportunity for all the tasks that this user needs to complete.
If you always create a new Project when an Opportunity has been Won then you can include that in your workflow too.
When a Project has been created, you can continue with a dedicated Workflow Automation for Projects, making sure they're assigned to the right user and/or team, and with the right Track applied right away - ready for the Project work to start without delay.
Below you'll see an example of what a Workflow Automation can look like, to give you a better idea of what can be done.
How to create a Workflow Automation
While Workflow Automations are used on the account as a whole, only a Capsule Admin has the ability to create and update Workflow Automations. They can be setup for both Sales Opportunities and for Projects.
To create a new Workflow Automation:
1. Go to Workflow Automations and switch to the tab for either Opportunities or Projects depending on what you want to do.
2. Use the button to Add Automation.
3. At this point you again get the option to to create an automation for Sales Opportunities or for Projects. For this example we'll stick with the Sales Pipeline. Choose the Pipeline that you want the Automation to run in.
4. Now you're ready to add your Triggers. The Triggers are either when an Opportunity reaches a specific Milestone or when the status changes to 'Won' or 'Lost'.
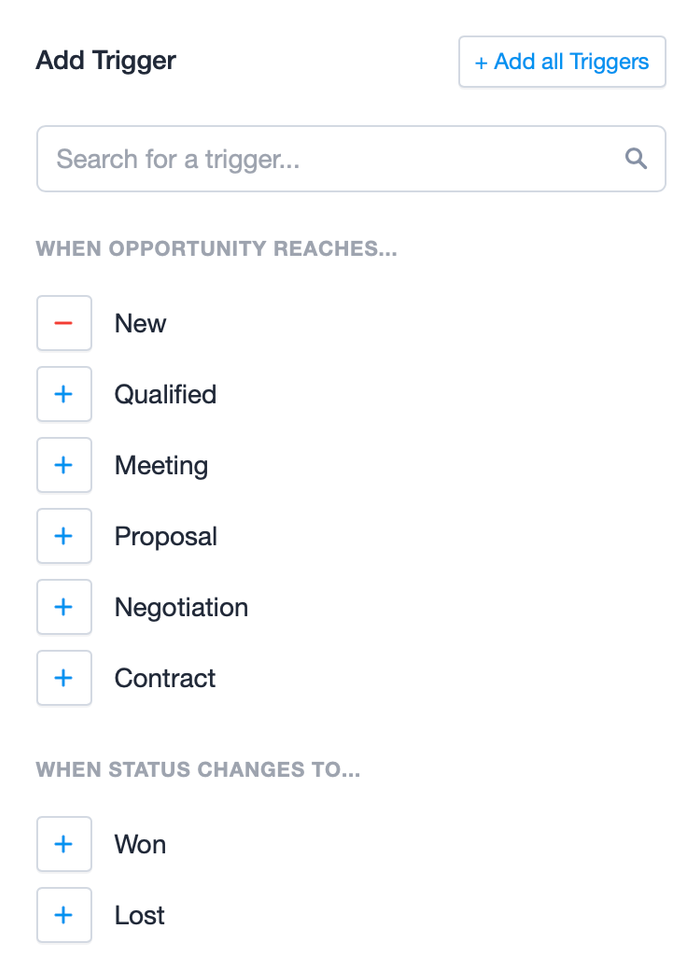
5. Click the + next to the trigger you want to add it.
6. Now that you have a Trigger, you have the option to +Add Action for the Trigger. The available Actions are: Assign to User, Assign to Team. Add Track and Create a linked Project.
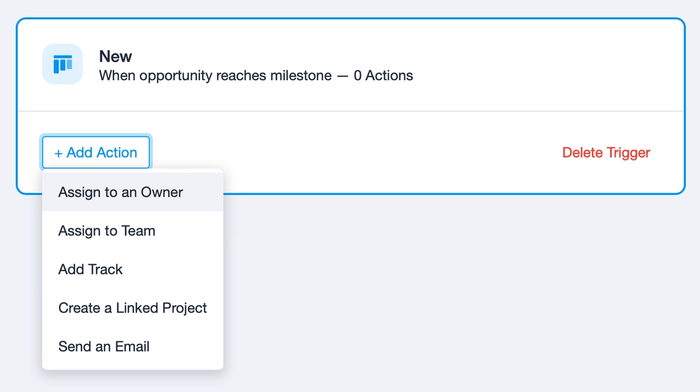
7. If you choose to add a Track then you can create a subsequent Action for when the Track is complete. It could either change the Milestone or close the Opportunity.
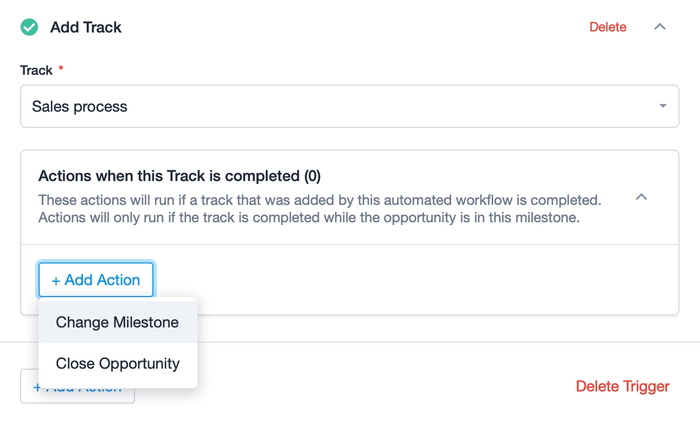
8. Repeat the Actions until you have everything you want setup.
9. Continue adding Triggers for each Milestone you want to automate actions in and any status as well.
10. The Automation is automatically saved as you set it up.
11. If you'd like to test the Automation then you can use the button to Test this Automation. This will create a test Opportunity which you in turn can use to move between your Milestones to see the Actions happening.
12. When you have done all your testing and you're ready to activate the Automation, give the Automation a name using the option in the top left corner and then switch the toggle in the top right hand corner from OFF to ON.
13. Now as soon as there's an Opportunity created or moved to the Milestones in your trigger, the Actions within it will be done.
How to edit a Workflow Automation
If you need to update your Workflow Automations then a Capsule admin can do that by following these steps:
- Go to Workflow Automations > click the tab for Opportunities or Projects depending on what you're editing > click on the Automation you want to edit in the list.
- Before you can make any changes to the Actions you need to deactivate the Automation by sliding the toggle in the top right hand corner from ON to OFF.
- Now you can make any changes you need.
- When you're done, make sure to set the Automation to ON again and you're all set.
How to use Tracks in a Workflow Automation
If you're using the Action to Add a Track in your automation then you get an extra option for adding additional Actions for when that Track is completed. These Actions could be to change the Milestone/Stage or to Close the Opportunity/Project altogether. Whichever you choose, it's important to understand that this Action will only happen if the Track is completed while still on that same Milestone/Stage.
For example, if in the 'Negotiation' Milestone you've setup an Action to add a Track and an Action to Close the opportunity when the Track is completed, if you move the milestone to 'Contract' before the Track is completed, that action to Close the Opportunity will never run.
How to send an email using a Workflow Automation
Workflow Automations are a great way to ensure the right emails are sent to your contacts in a timely manner.
Once you have your triggers added, you'll find the Send an Email action in the list of actions to select from.
The 'Send an Email' action uses your existing Mailbox Connection setup and Templates to send emails you're already used to sending, but without your manual input.
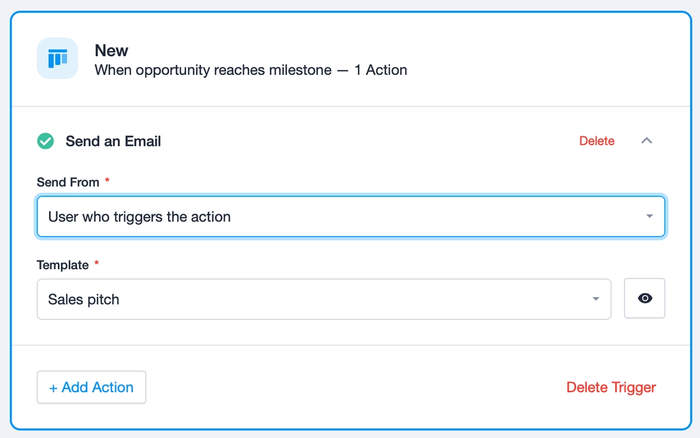
When configuring the action you can choose to either send the email from the 'User who triggers the action' or from a shared mailbox in your account.
Once you've selected what template to use, you can preview the template by clicking on the little 'eye' icon next to the selected template.
When a Workflow Automation sends an email from an Opportunity or Project, Capsule automatically selects the most appropriate contact:
- Primary contact (if they’re a person with an email address)
- Another linked person at the same organisation with an email address
- Otherwise the organisation’s email address
Capsule chooses the recipient in this order to ensure the email goes to a person whenever possible.
How to create a new Project or Opportunity using Workflow Automations
After a Project or Opportunity is closed, there may be situations where you want to create another. This can be useful for managing renewals, repeat sales, or post-sale/project follow-up, without having to manually create and configure new records each time.
1. Go to Workflow Automations and switch to the tab for either Opportunities or Projects, depending on what you want to do.
2. Select the closed State. The Triggers for the action are either:
- Opportunities - when the status changes to Won or Lost
- Projects - when the status changes to Closed

3. Select + Add Action and choose the option to Create Another Opportunity (if it's an Opportunity Workflow Automation) or Create Another Project (if it's a Project Workflow Automation).
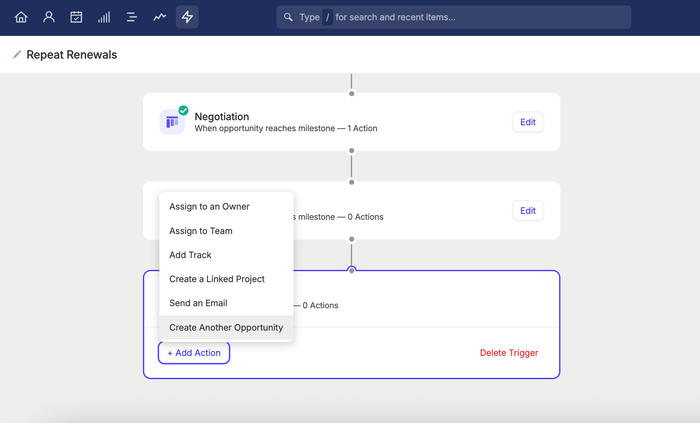
4. Fill in the main details of the new Opportunity or Project, such as the Name, Owner/Team etc.
5. Each time a record is closed - a new one will be created by your Workflow Automation, with the information chosen in the settings above.
How to test a Workflow Automation
When you have created your Automation, before you activate it you have the ability to test it out.
- Use the button at the top of the Automation to Test this Automation. That will give you a prompt to create a new test Opportunity/Project in the Pipeline/Board that your Automation is in.
- Choose the Milestone/Stage that you want the test Opportunity/Project to go into and then use the button to Create Test Opportunity.
- You'll now be taken directly to the test Opportunity/Project.
- Now you can move the Opportunity/Project through its Milestones/Stages to see the Automation Actions happen as you've defined them.
How to deactivate a Workflow Automation
If you want to stop a Workflow Automation from running then you can follow these simple steps:
- Go to Workflow Automations > click the tab for Opportunities or Projects depending on what you're working with.
- From the list view, switch the blue toggle next to the Automation name from ON to OFF.
How to delete a Workflow Automation
If you no longer need a Workflow Automation at all then you can follow these steps to delete it:
- Go to Workflow Automations > click the tab for Opportunities or Projects depending on what you're deleting.
- From the list view, click on the trash can button next to the Workflow to delete it.
- Confirm the deletion using the red Delete button and you're all done.
Troubleshooting Workflow Automations
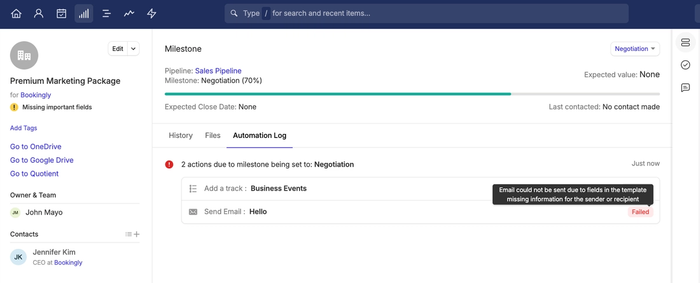
If an action in your Workflow Automation fails for a specific record, Capsule will tell you why. The Super Administrator will also be notified by email of this failure, with a link to the record:
- Click the link in the email to take you to the record
- Choose the Automations tab
- Here, you will be able to view past automation history, including any actions that have failed
- Hover over a failed status for more details on the failure
The example below shows a failure for a Send Email action - specifically where one (or more) of the Email Template fields couldn't be filled out for this individual Opportunity:
